

~/.codex/config.toml. After connecting AIHubMix, a single API key lets you call GLM, Claude, Gemini, DeepSeek and other vendors’ models without locking into one vendor. This guide covers two approaches: the basic approach (a single fixed model, fastest to start) and the custom-model approach (a model_catalog_json catalog file so you can switch anytime from the /model list).
Video walkthrough
Prefer a video walkthrough? This tutorial shows how to configure AIHubMix in OpenAI Codex using CC Switch and run DeepSeek V4 Flash.Installation
Official Download (macOS Version)
https://openai.com/en/codex/Install via Command Line
Basic Configuration
Configure Using Configuration Files
- Modify the
~/.codex/config.tomlconfiguration file to add the following settings:
- Set the environment variable named by
env_keyto your AIHubMix API key (no spaces around=):
~/.zshrc / ~/.bashrc to persist it. Get your Key from the AIHubMix console.
By default, a custom provider does not read
OPENAI_API_KEY from ~/.codex/auth.json. Pass the key through the environment variable named by env_key; otherwise requests go out without a key and return 401.model to any other model ID on AIHubMix. For non-OpenAI models such as GLM or Claude, Codex shows Model metadata for ... not found and falls back to default settings; use the custom models approach below instead.
Configure via cc-switch
- Run CC-Switch and add the provider.
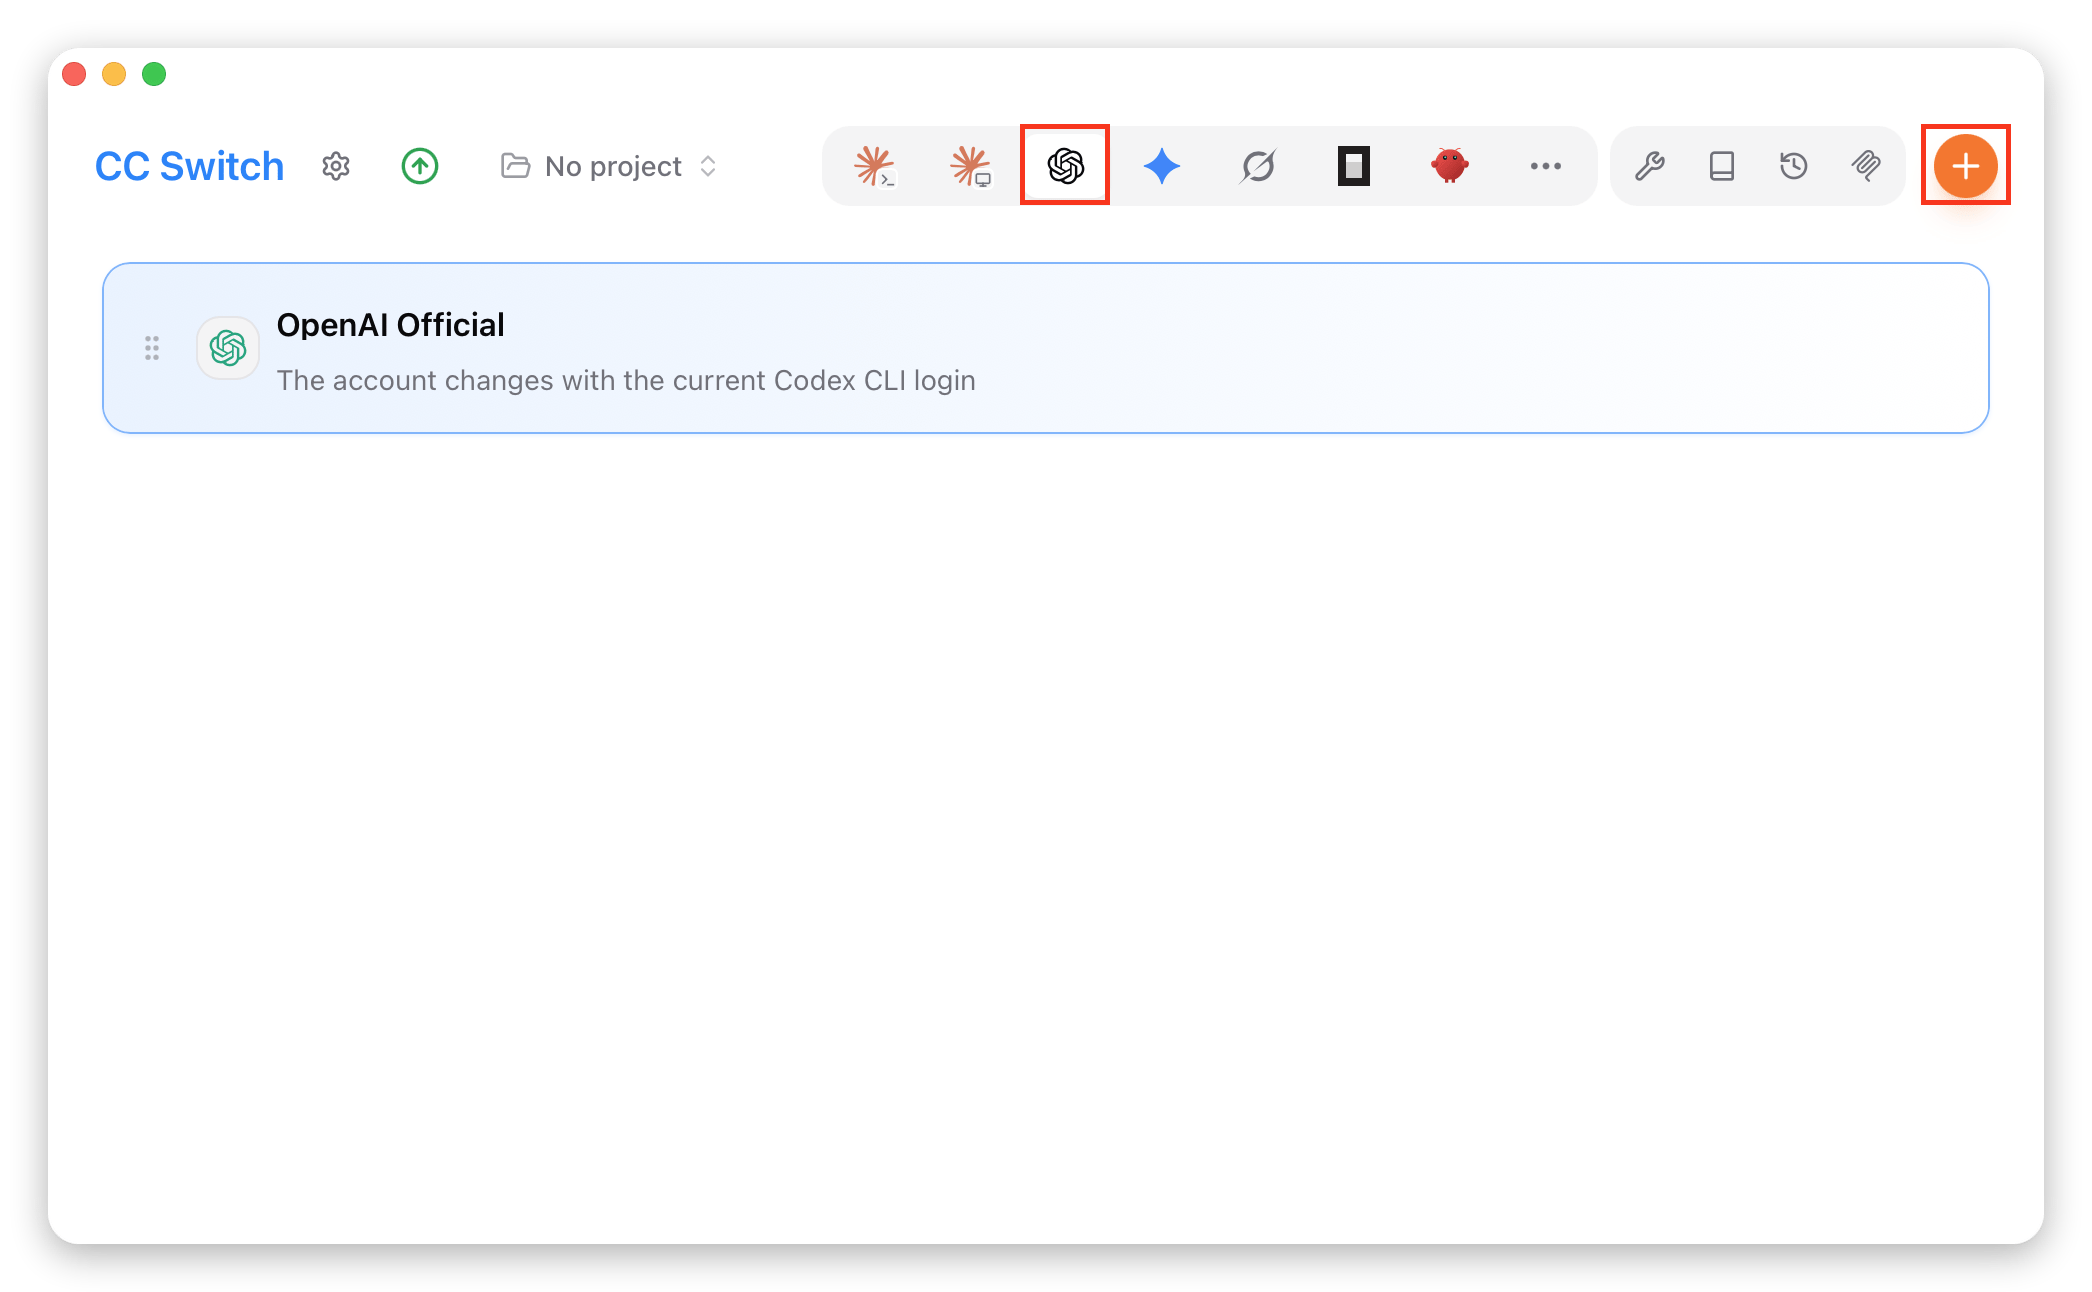
- Select “AiHubMix” from the preset list.
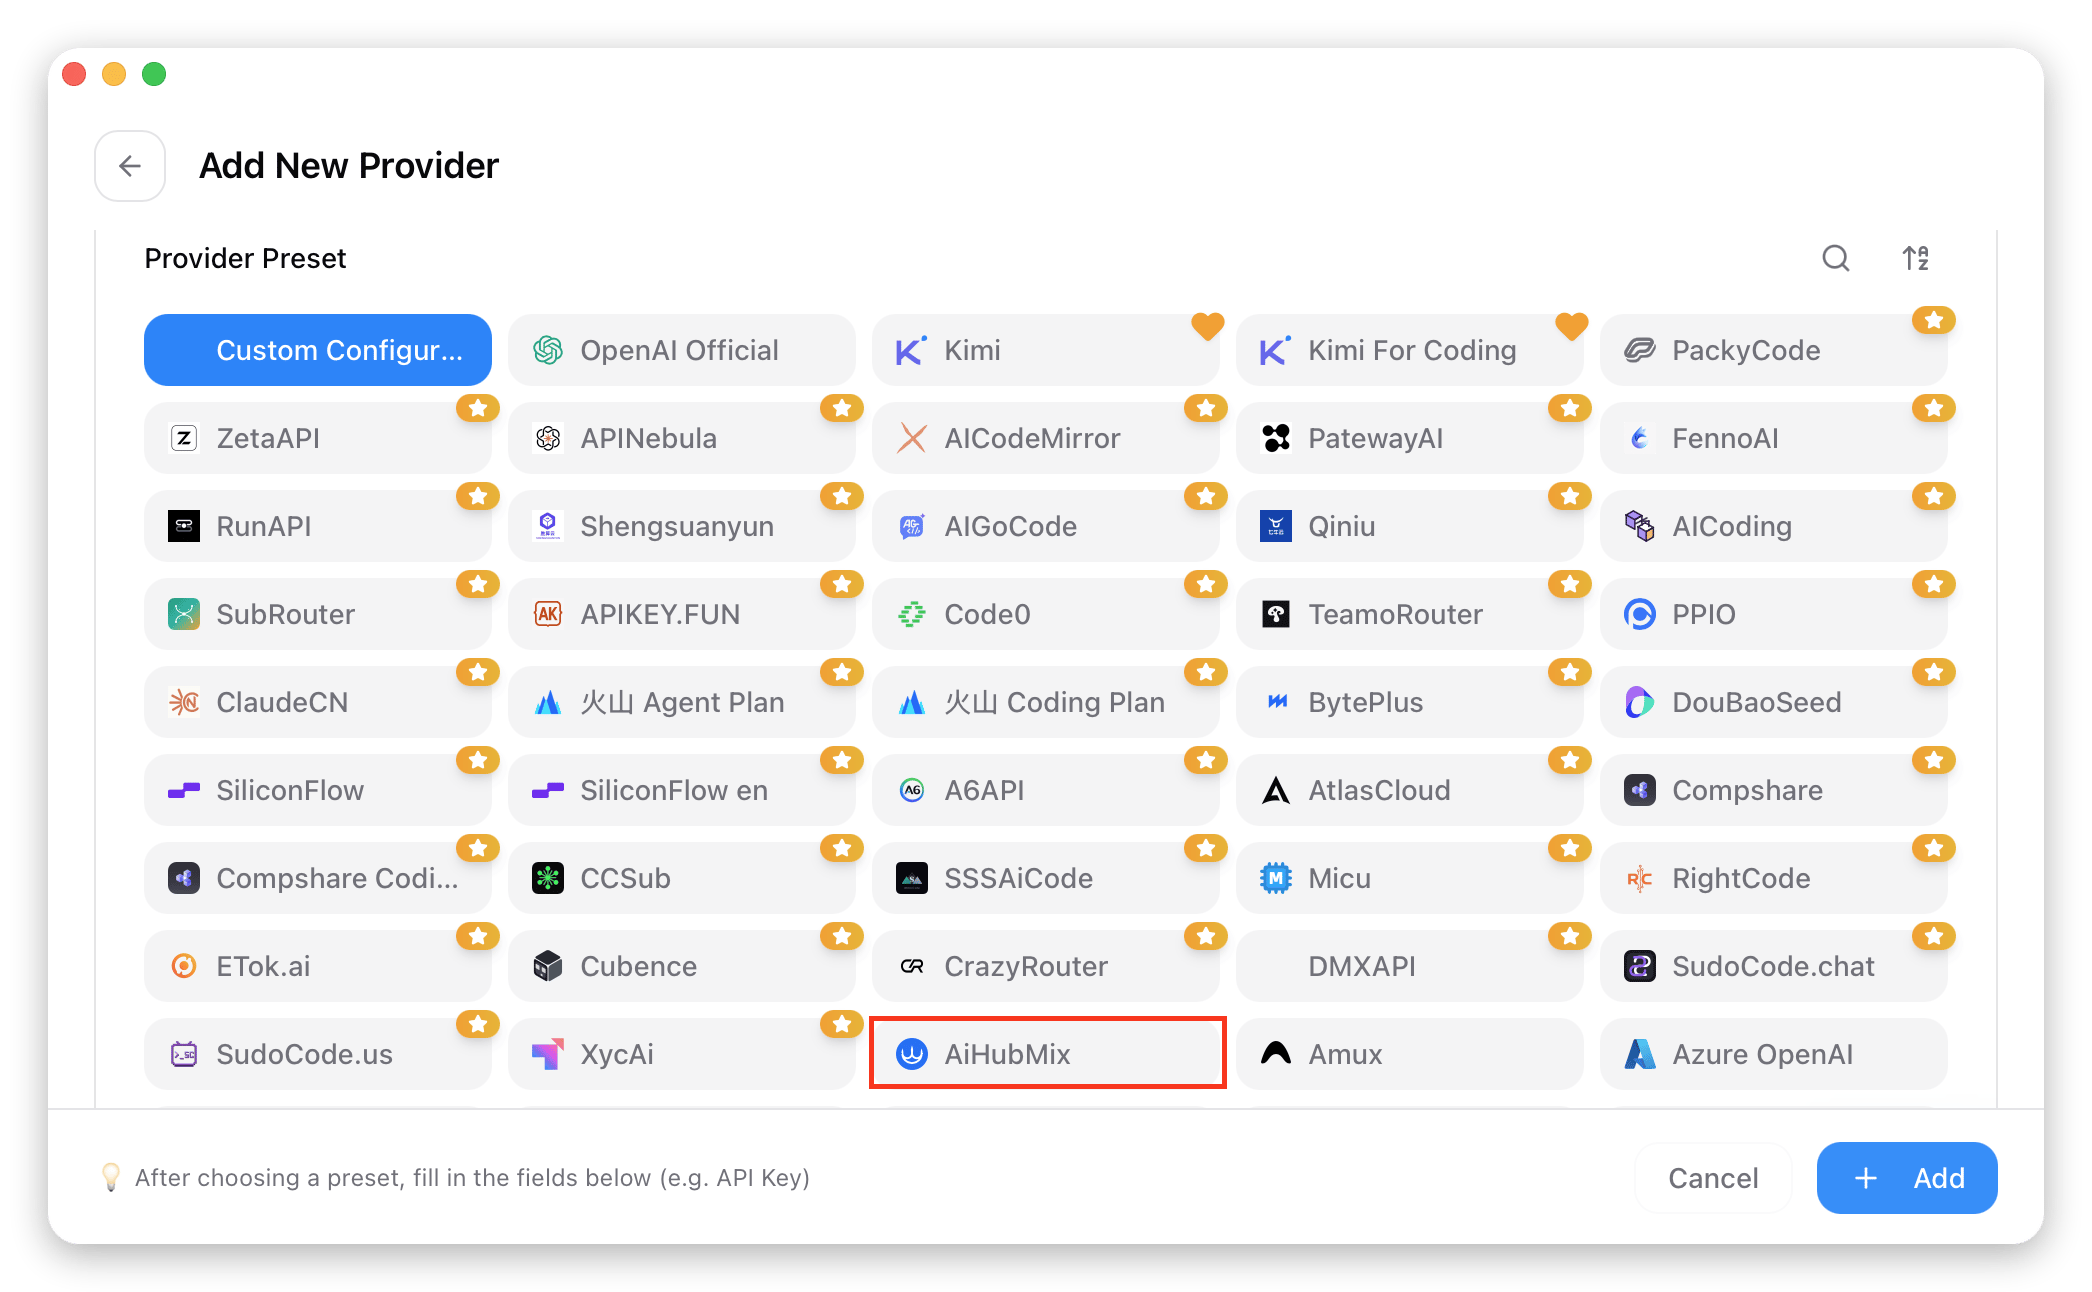
- Enter your key in the “API Key” field and click “Add” to save the settings.
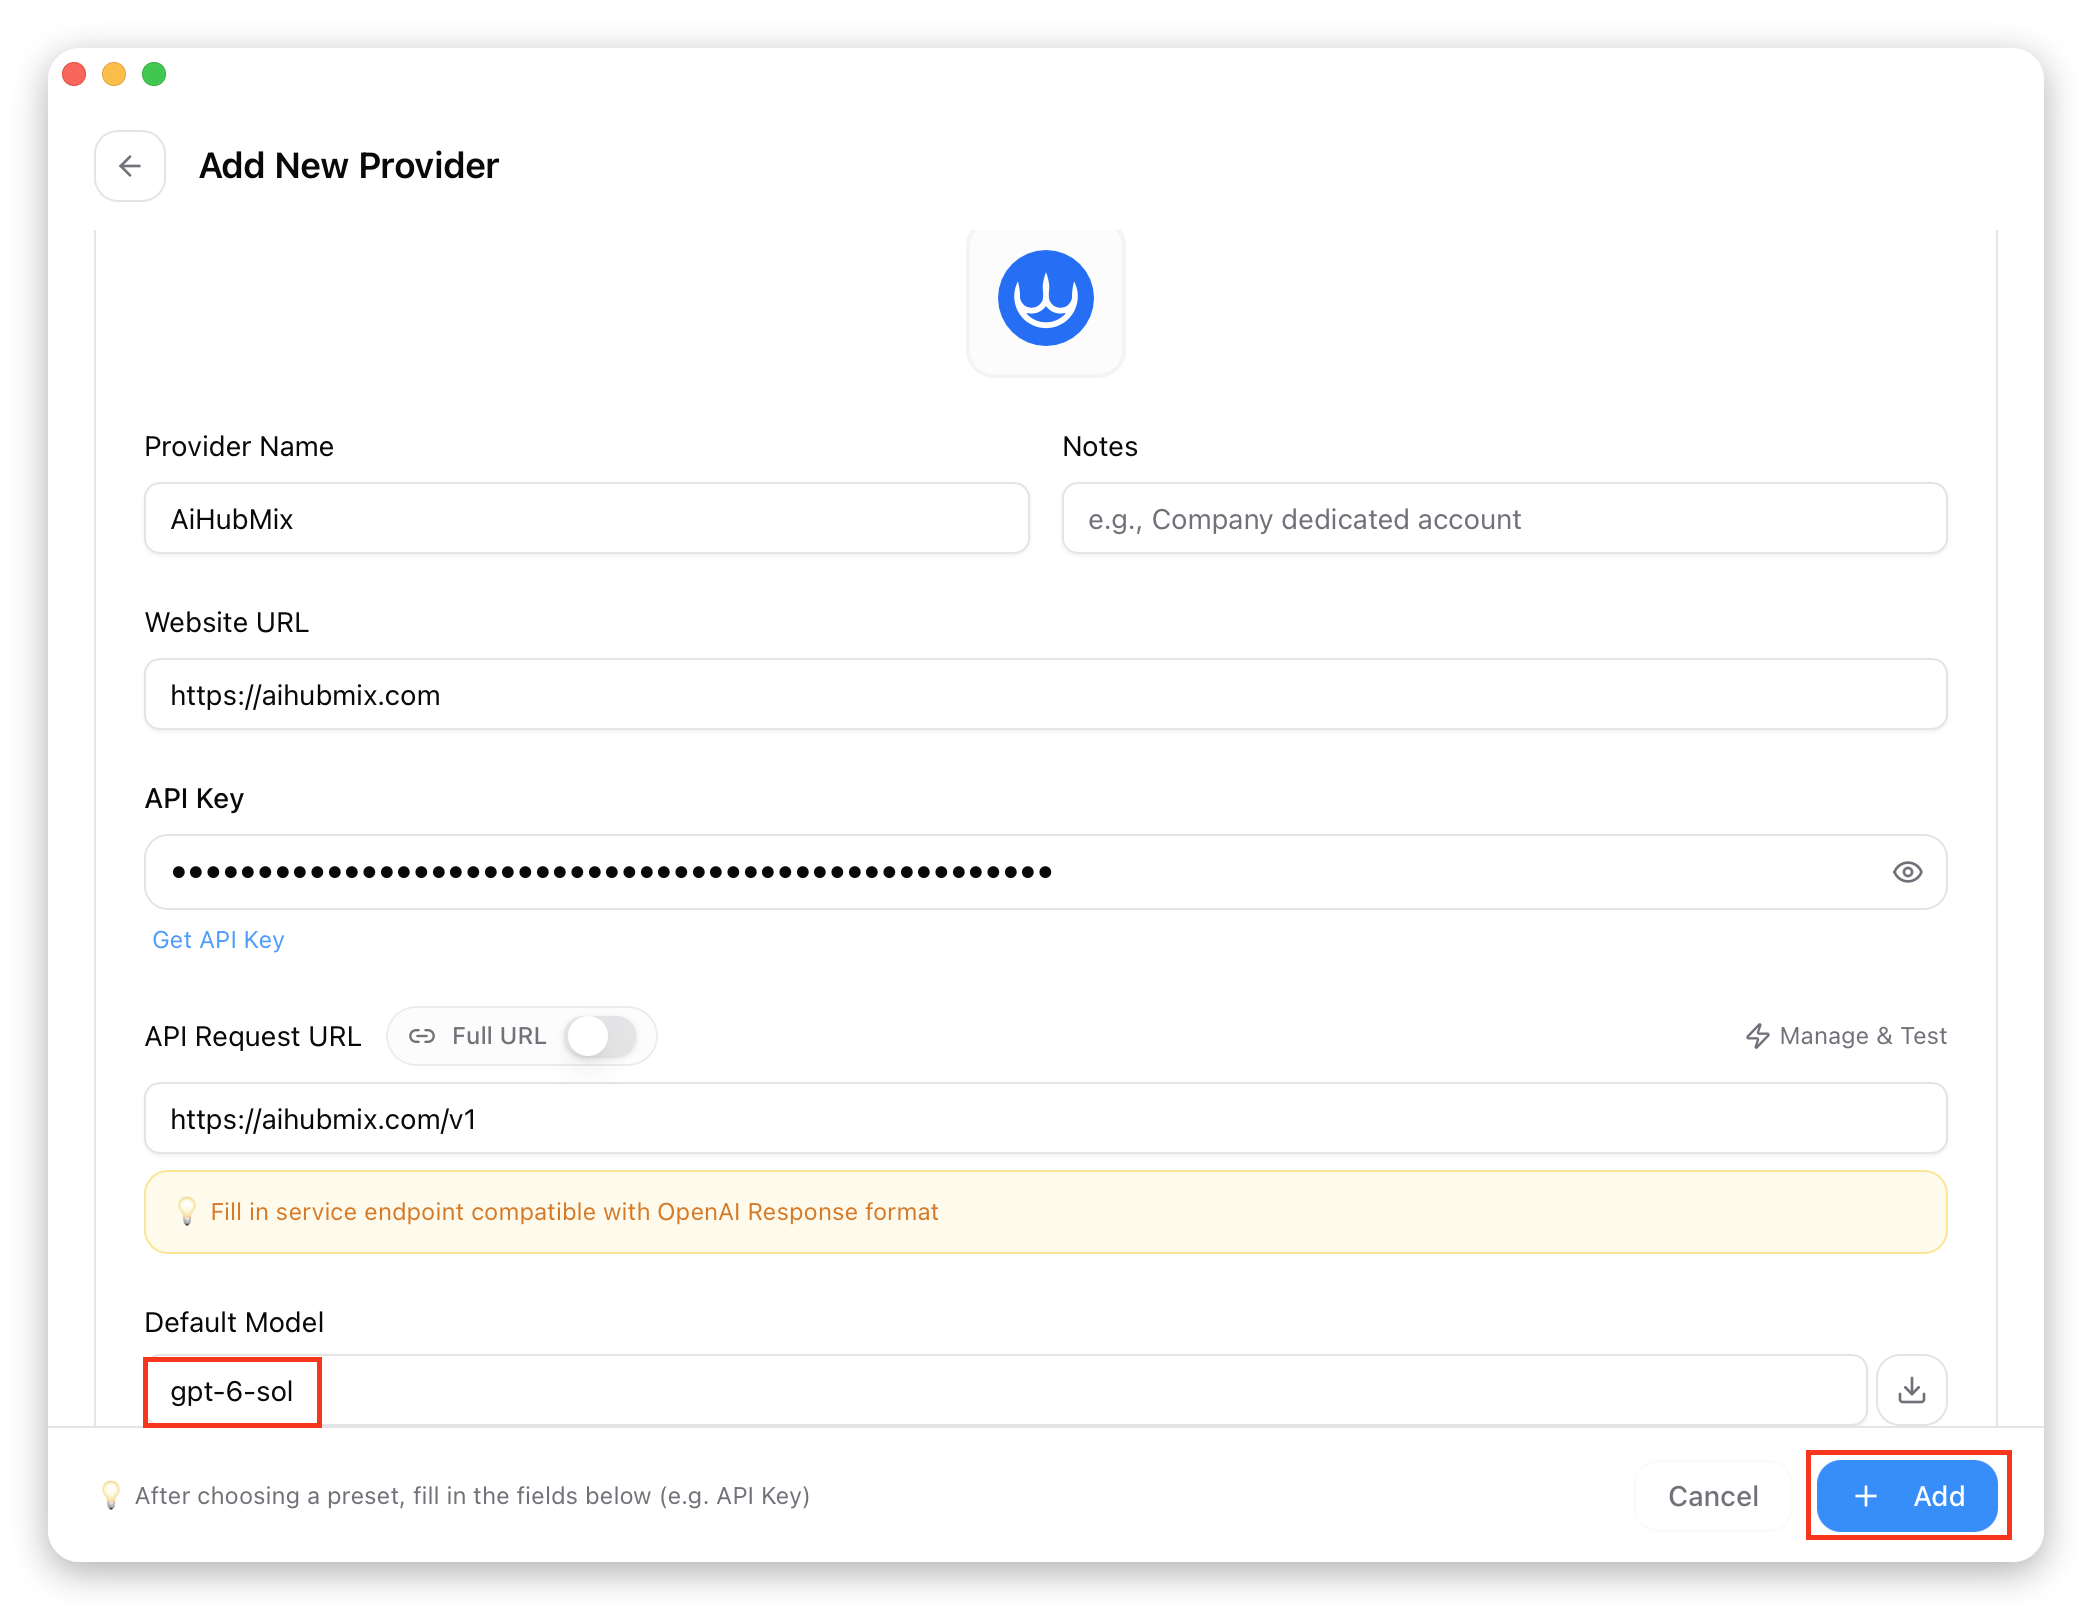
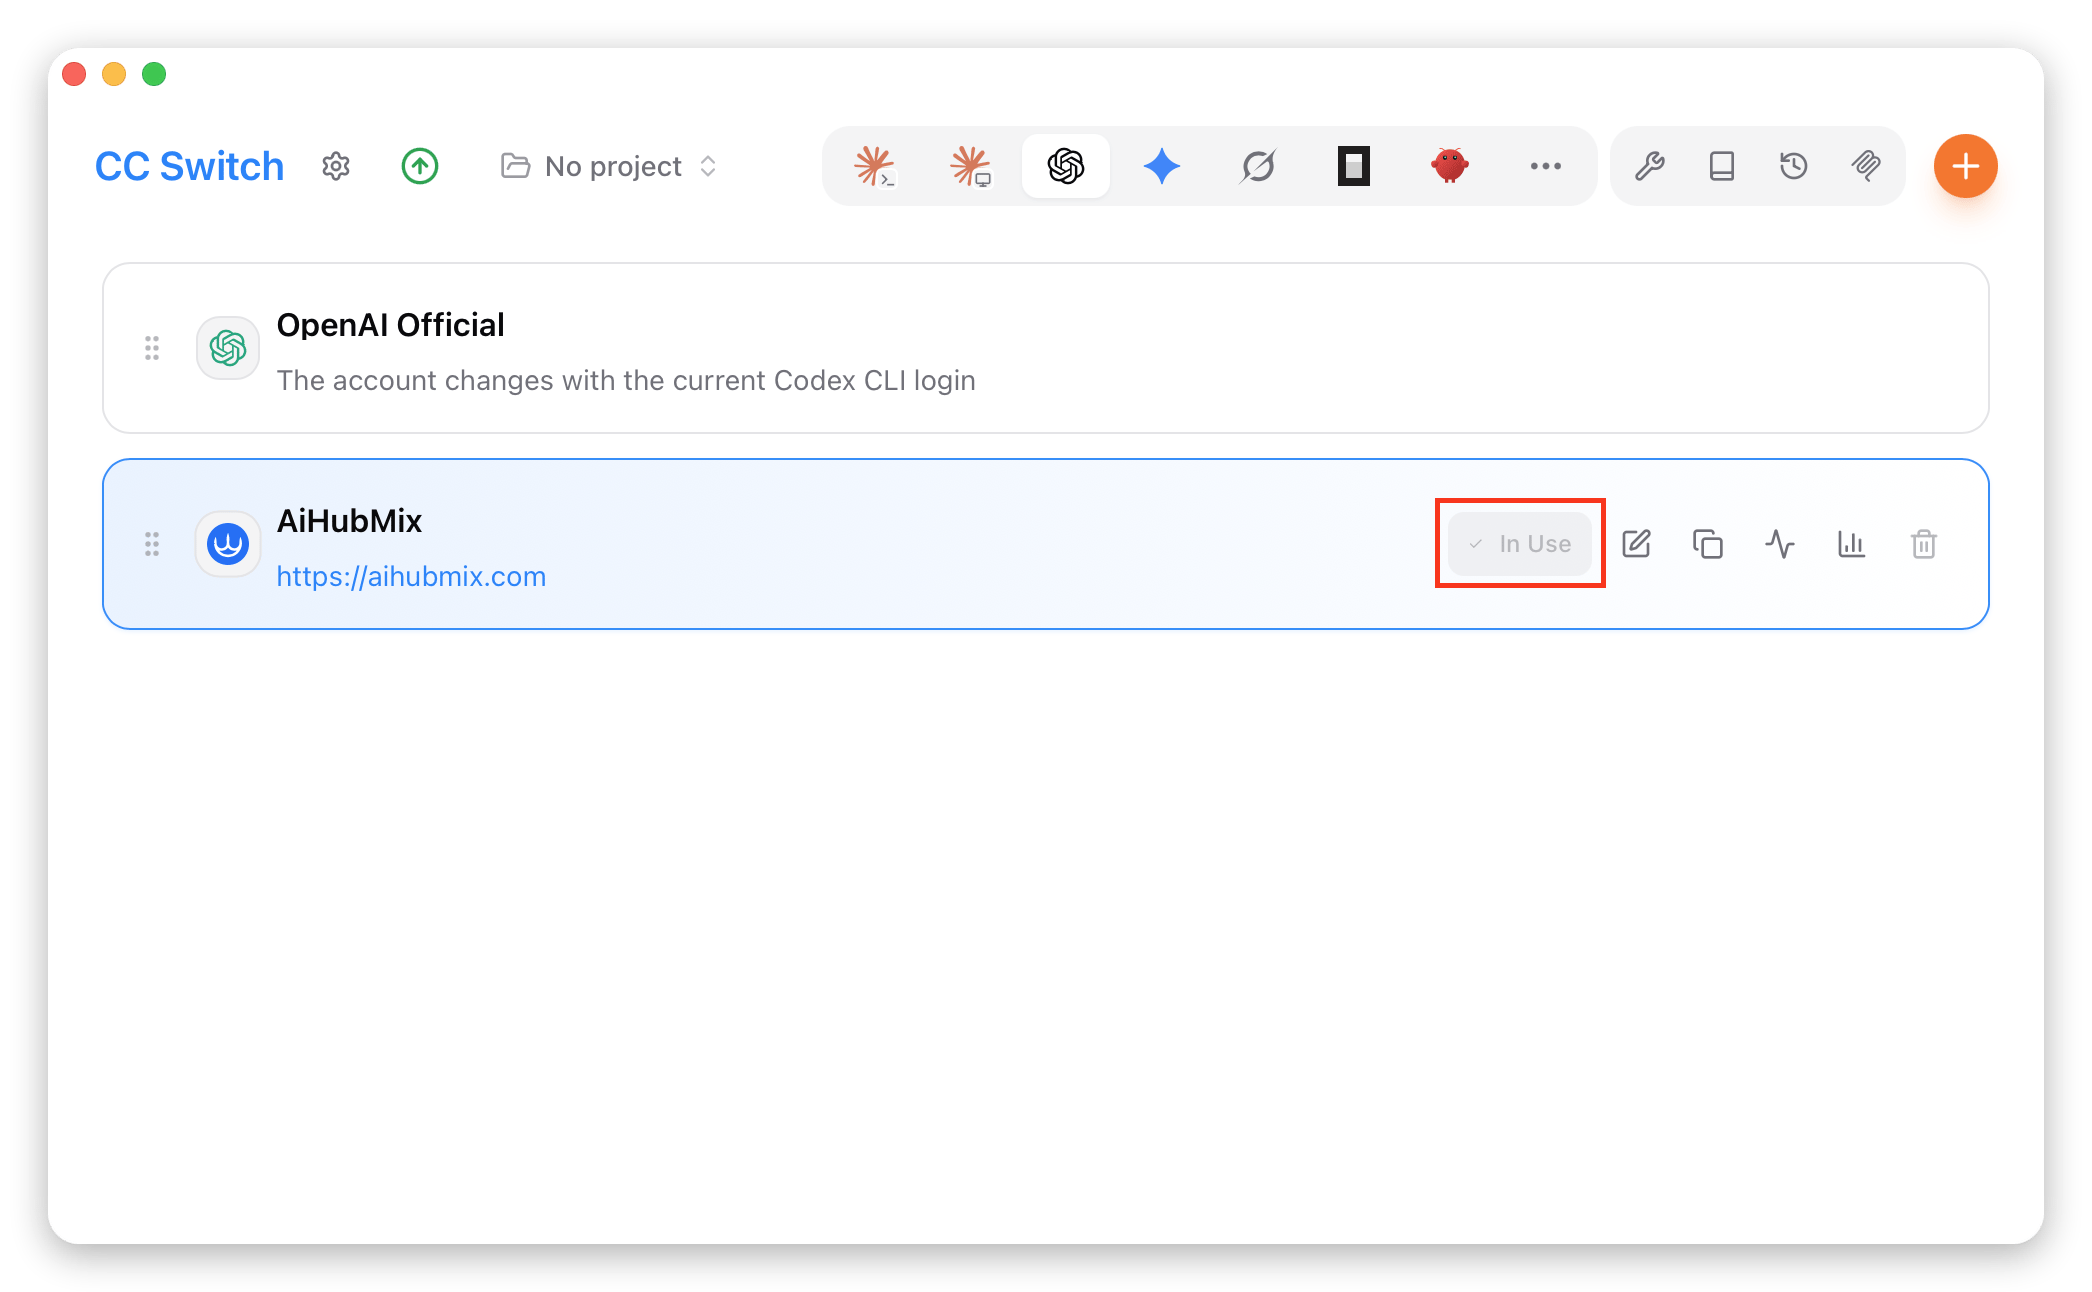
- Return to the home page, select “AiHubMix” from the provider list, and click “Enable” to start using it.
Using Codex
Using in the Terminal
- Open the terminal, navigate to your project directory, and run the
codexcommand.
-
Set permissions as needed; you can change them anytime with
/permissions. -
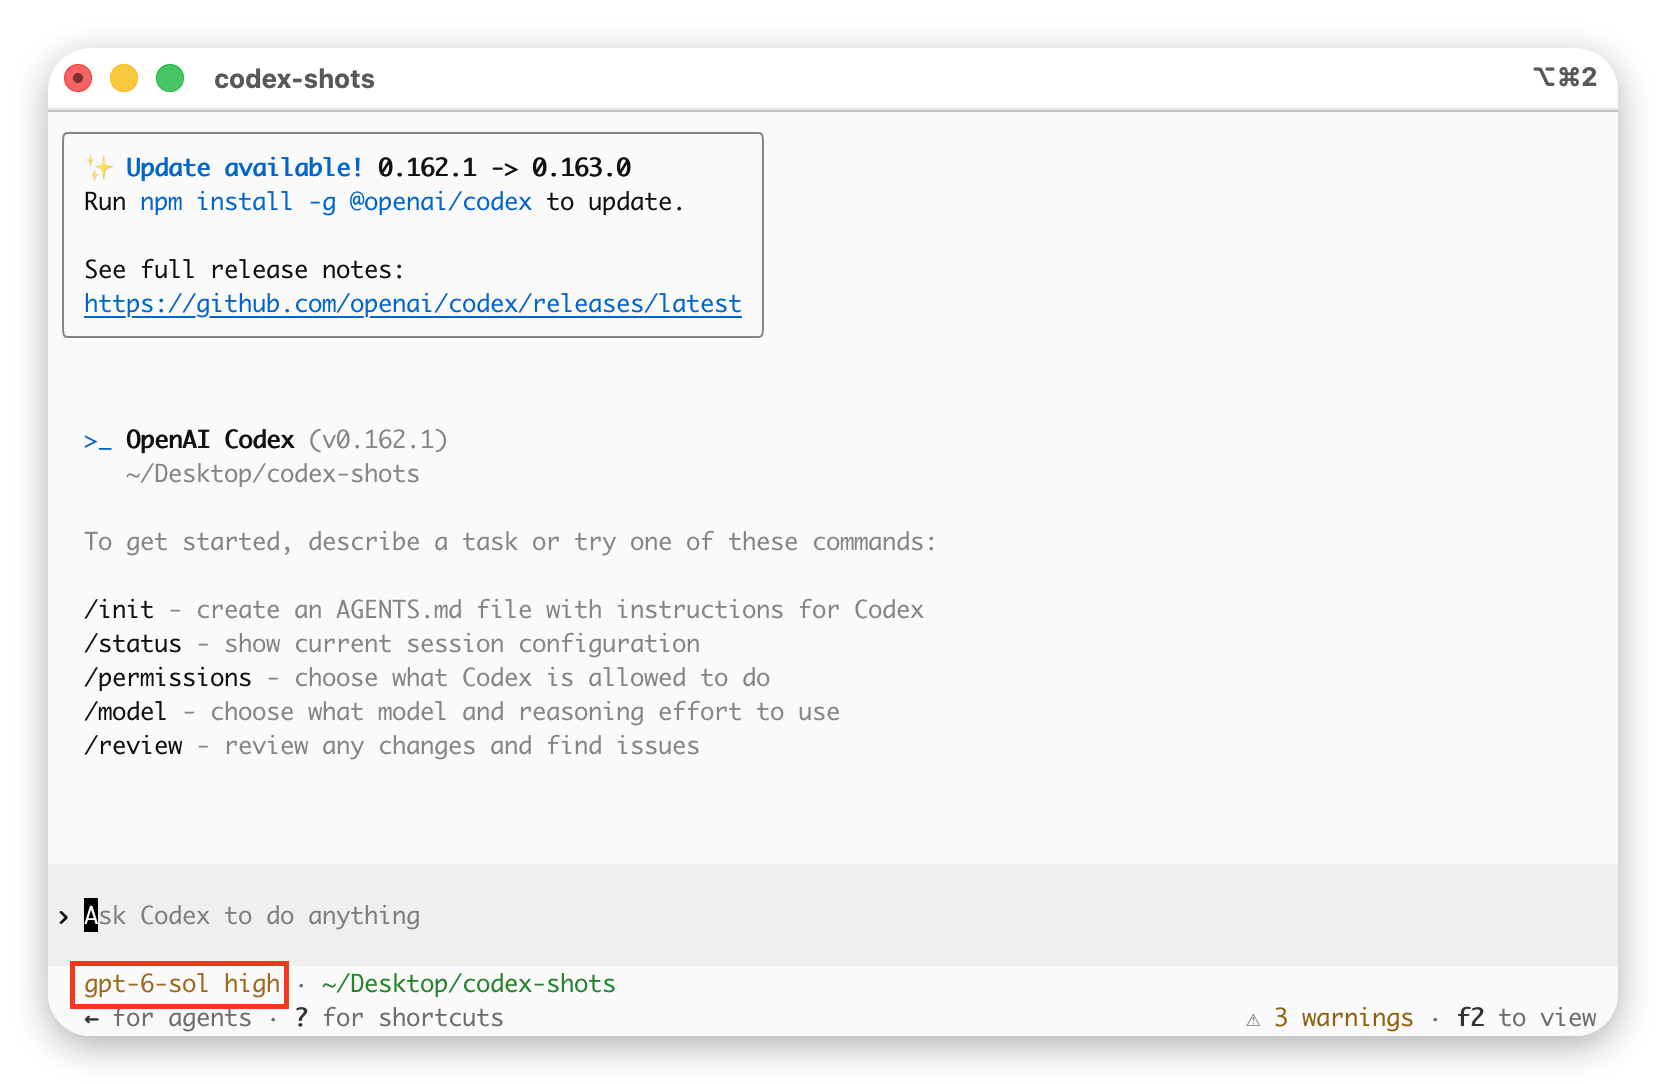
Select the model you need. The bottom status bar shows the current model; type
/modelto switch.
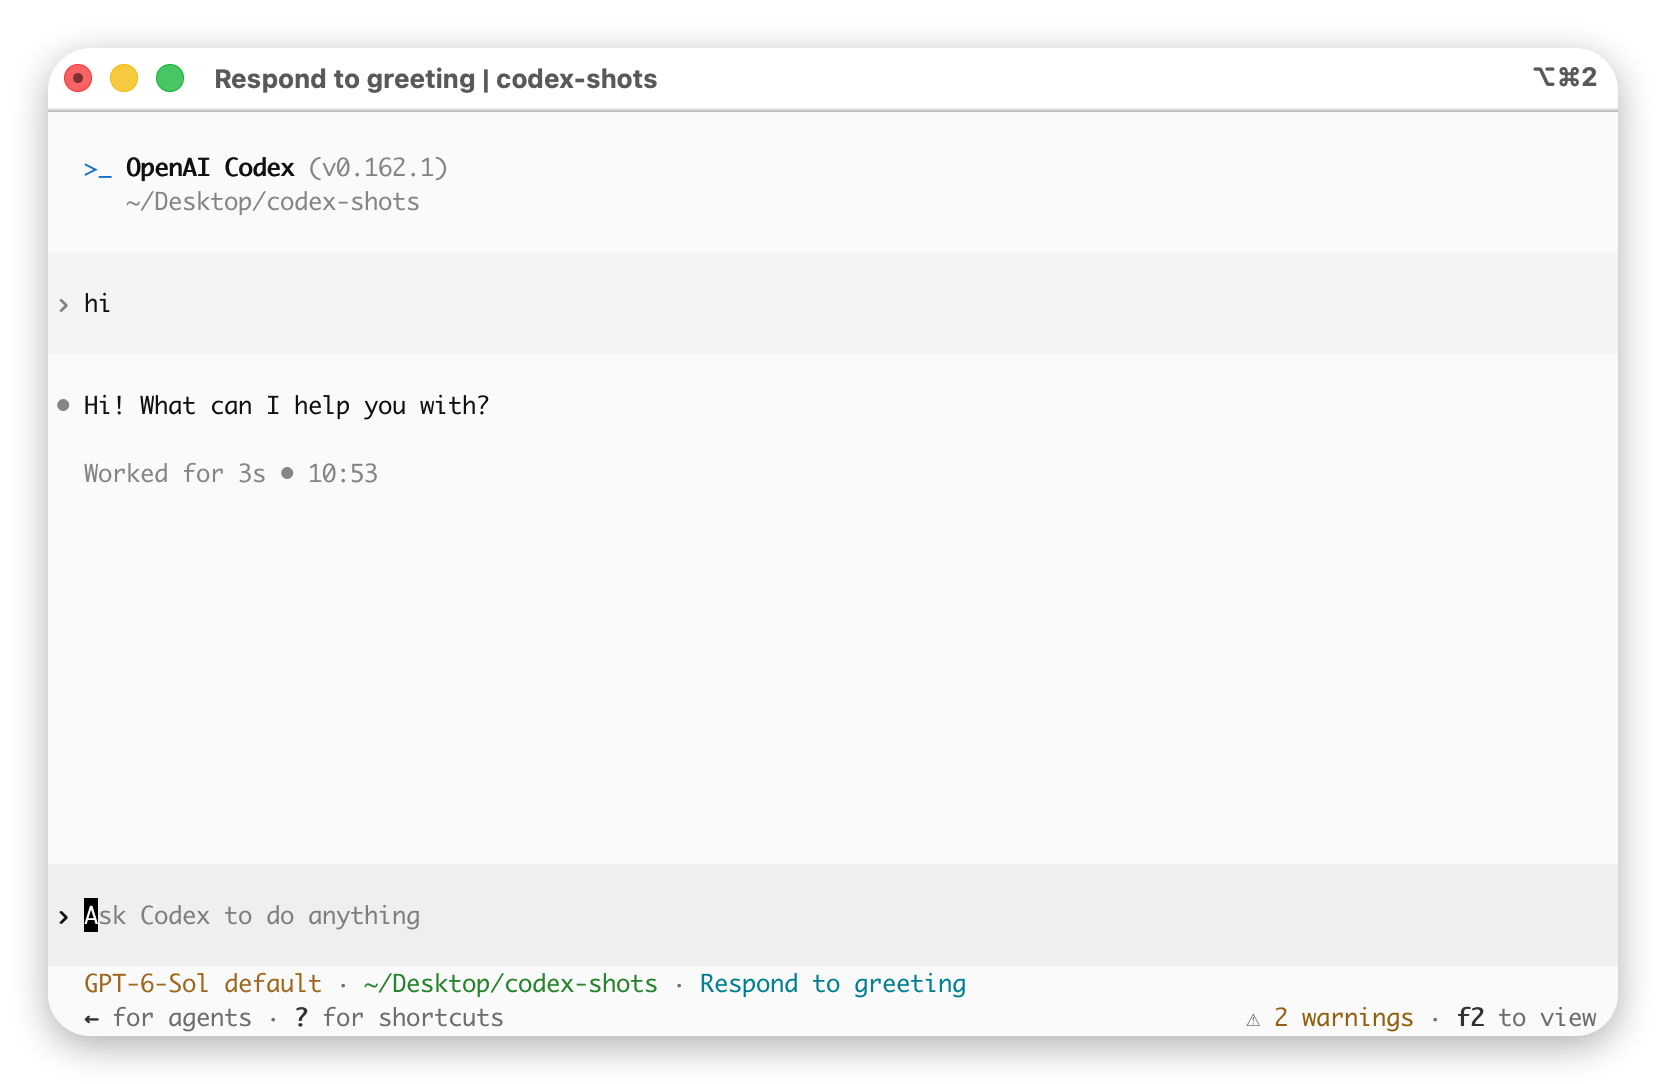
- Input natural language; if you receive a normal response, the configuration is successful.
Using in the Codex Desktop Application
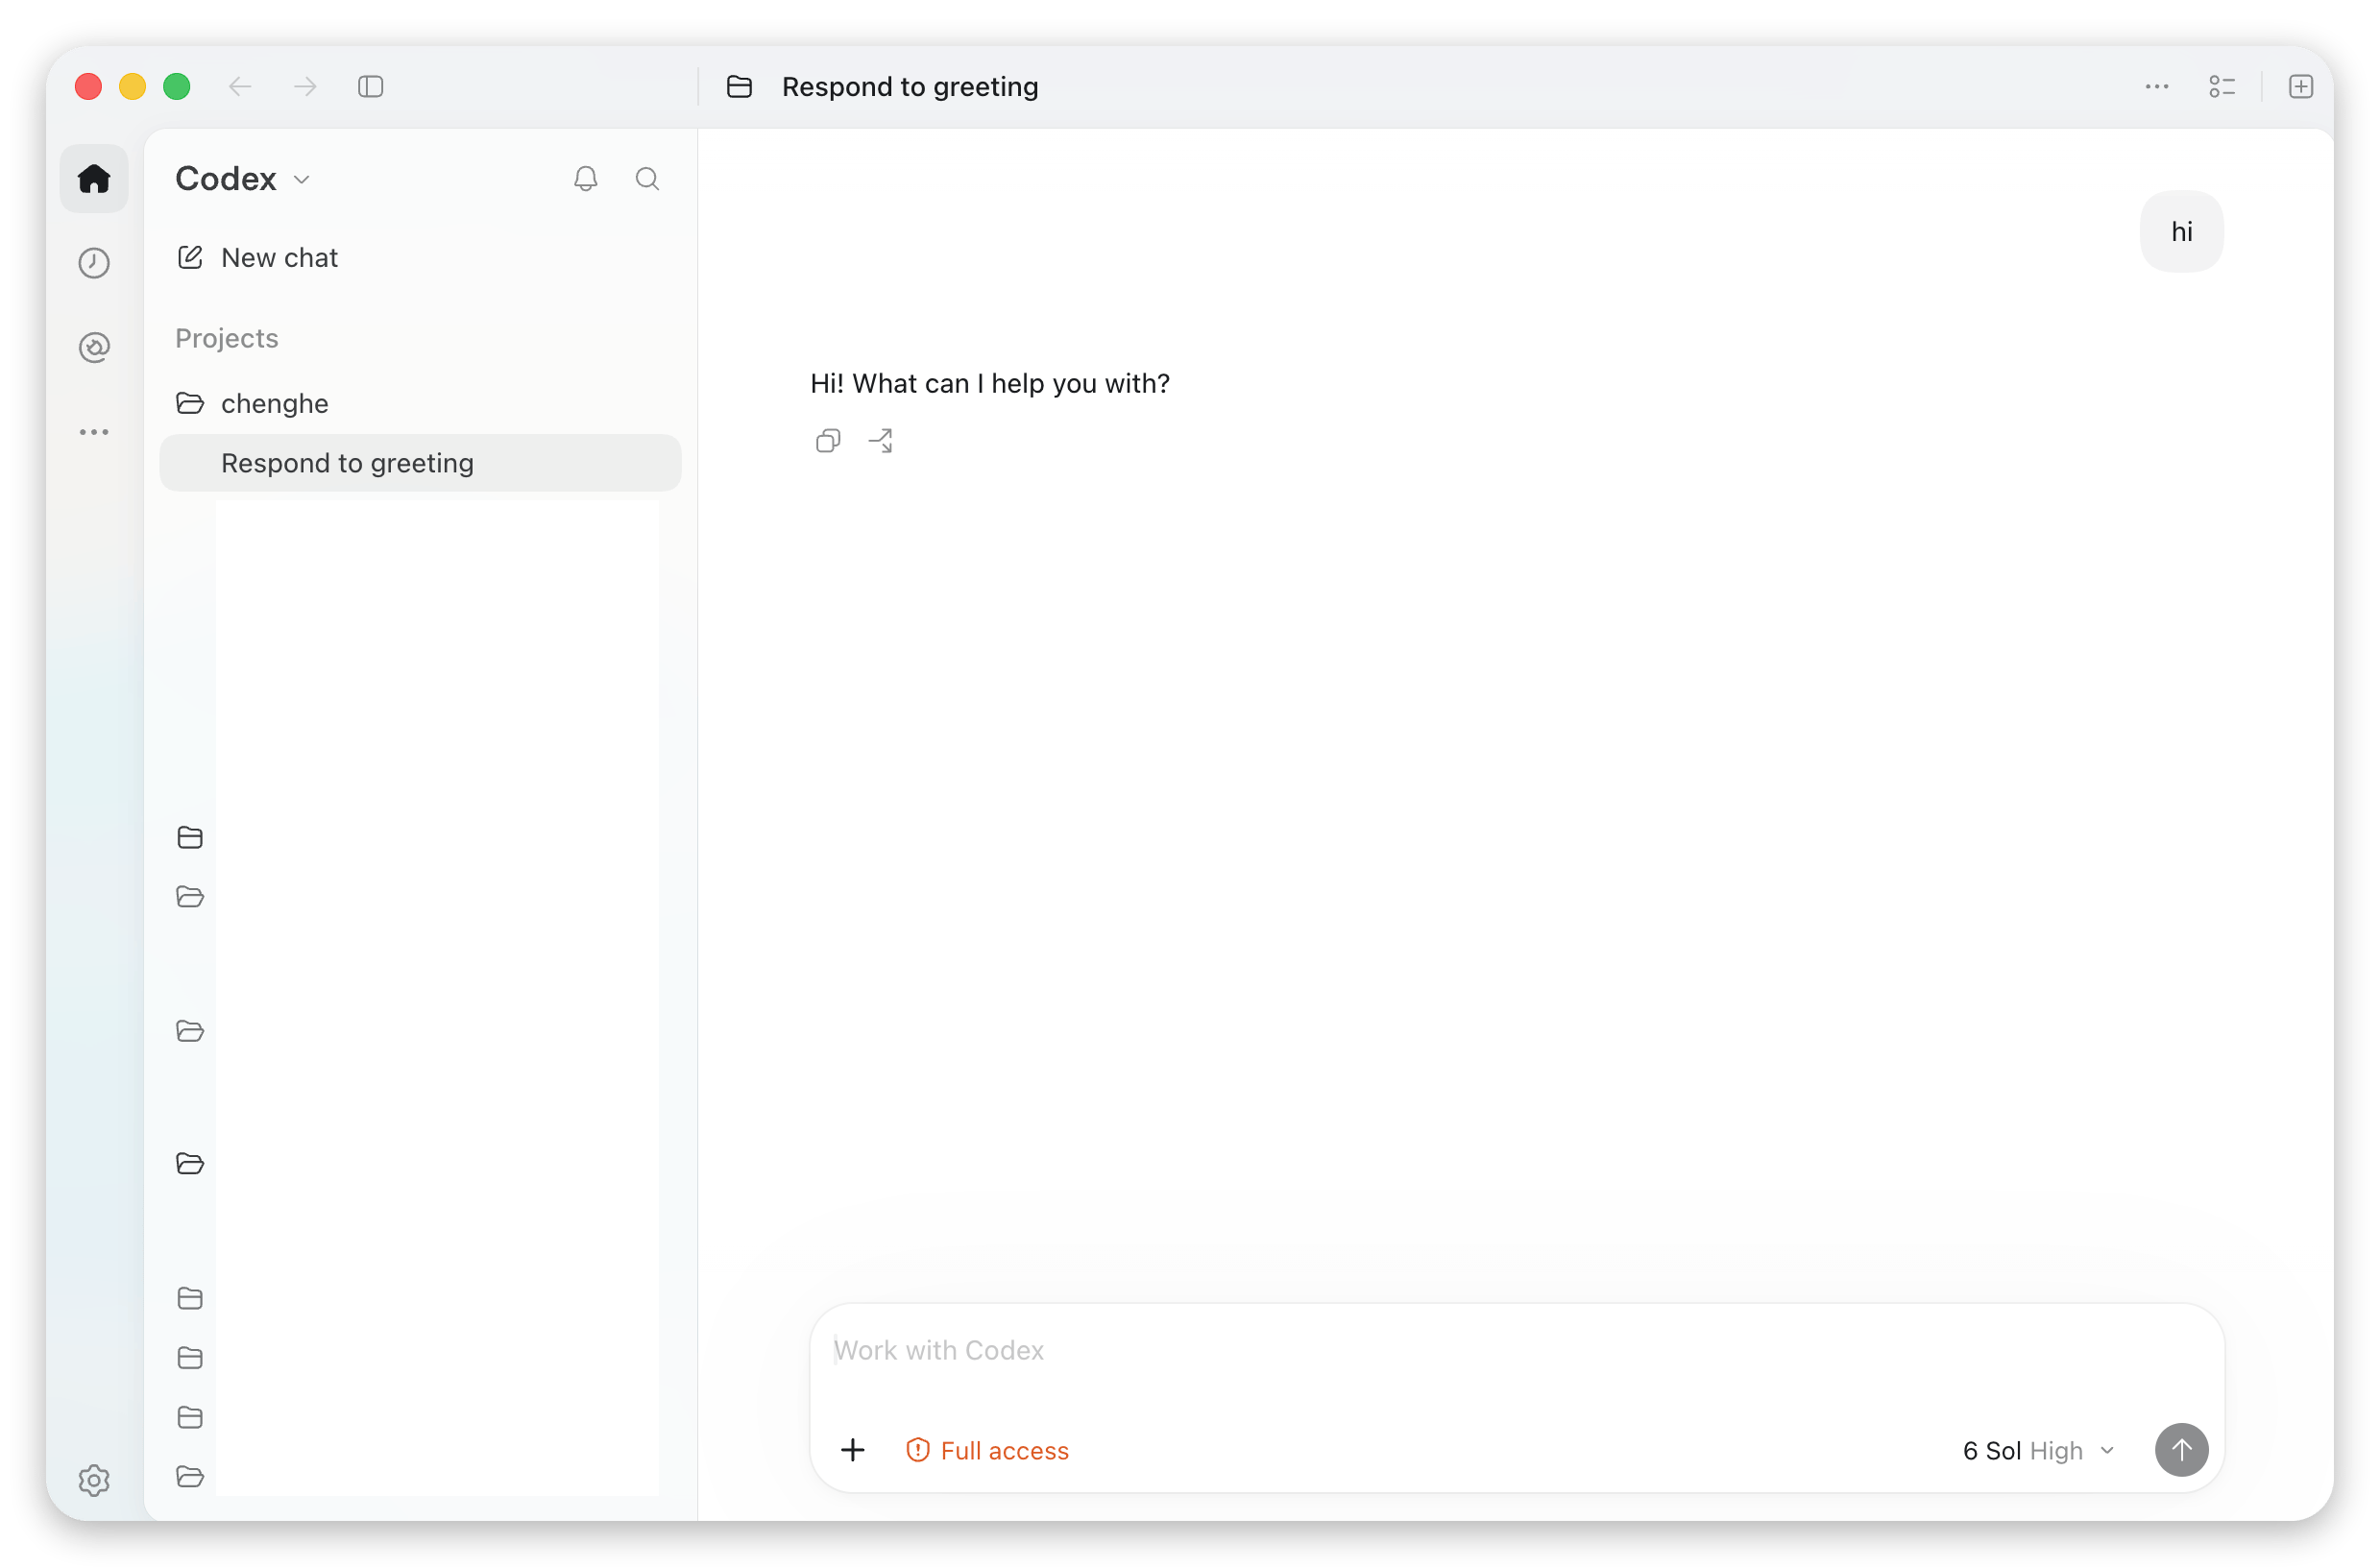
- Open the Codex desktop application and select the working directory.
- Enter the task in the input box; if you receive a normal response, the configuration is successful.
Useful Command References
Seecodex --help for the full list. The most common commands and options:
Using Custom Models in Codex
By default, Codex only shows OpenAI’s official models in the/model list. If you want to pick any model available on AIHubMix (GLM, Claude, Gemini, DeepSeek, Kimi, Qwen, etc.) directly from the list, you can use the officially supported “custom models” mechanism: declare the selectable models via a local JSON file (model_catalog_json), then point requests at AIHubMix with [model_providers.aihubmix].
Official documentation: Advanced Configuration · Custom model providers
Two integration approaches
The “Basic Configuration” section earlier on this page covers the basic approach, while this section covers the custom models approach. The differences are as follows; choose based on your needs:
The whole process is just 4 steps: generate the catalog file → edit
config.toml → set the environment variable → restart and select a model.
Step 1: Generate the model catalog file
The catalog file is a{ "models": [ ... ] } structure, where each element in the array describes a model that can be selected in /model. Below we first explain the fields using a single fixed model, then provide a script to batch-generate the top 30.
1.1 First understand the format: a single fixed model
Below is a minimal complete catalog that has been verified to parse correctly in Codex (containing only one model,glm-5.2). Save it as ~/.codex/model-catalogs/custom-models.json and it’s ready to use; to add more models, keep appending entries with the same structure to the models array.
About
base_instructions: it is the system prompt for that model. The example uses a single sentence as a placeholder, and the model runs fine; to get coding performance closest to native Codex, replace it with the full base_instructions of any built-in model from codex debug models --bundled (that’s exactly what the batch script in the next section does).
The official catalog uses snake_case fields (
display_name, supported_in_api, visibility). Two kinds of errors both cause the entire catalog to be discarded so no model shows up in /model: missing required fields report missing field ...; using camelCase legacy formats like displayName, hidden or unrecognized values report unknown variant .... Just stick to the field set in this article to avoid them.1.2 Batch-generate the top 30
Writing multiple entries by hand makes it easy to miss fields. To write the first 30 LLMs from the AIHubMix model list API into the catalog all at once, use the script below. It clones a built-in model as a template, so the required fields (including the correctbase_instructions) are inherently complete and never missing across Codex versions. Requires curl, python3, and the installed codex CLI:
slug, display_name, description, context_window, etc.) and limits reasoning levels to low / medium / high; all other required fields are cloned from the built-in template, which is exactly the field set from 1.1, except base_instructions uses the full official prompt.
The generated file is fairly large (each entry contains the fullbase_instructions, roughly 1–2 MB), which is normal. After running it, verify it parses correctly withcodex debug models(see Step 5).
Theimage_generationfilter line in the script is intentional: among thetype=llmresults, a very small number of models also carry theimage_generationtag (e.g.gemini-3.1-flash-image) and aren’t suitable for conversation; the script automatically skips them before taking the first 30.
Step 2: Modify config.toml
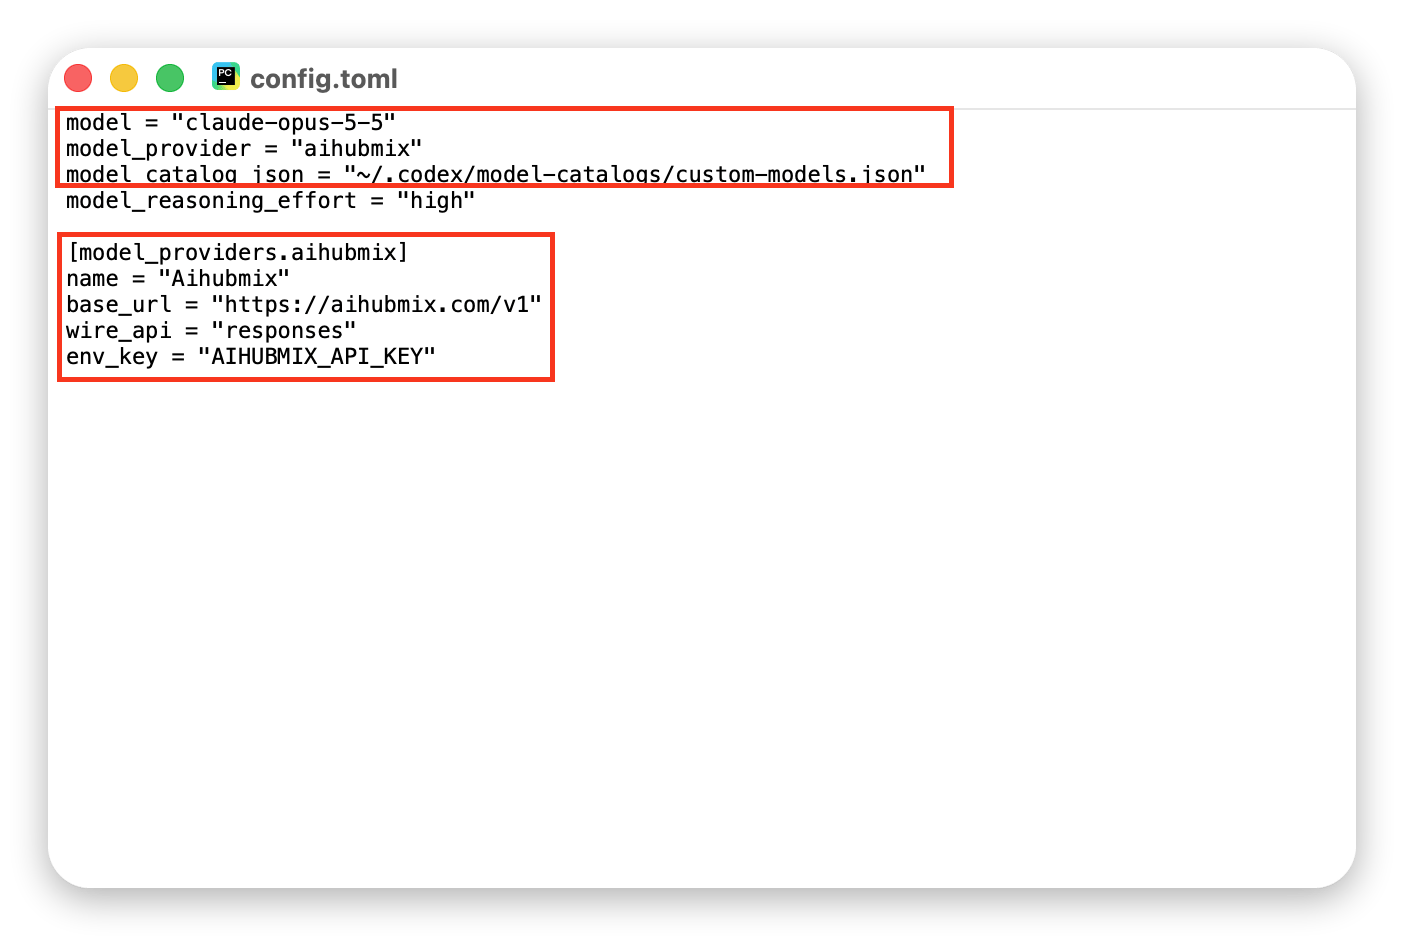
Edit ~/.codex/config.toml, add model_catalog_json at the root level, and define the aihubmix provider:
wire_api now only supports responses (also the default when omitted); chat is no longer supported. Codex only uses OpenAI’s Responses API (/v1/responses), and AIHubMix is natively compatible with the Responses API, so you can point directly at https://aihubmix.com/v1 without building your own conversion proxy.model must be a model that exists in your catalog. If you hand-wrote the catalog in 1.1, use glm-5.2. If you used the script in 1.2, the catalog holds whatever the API currently ranks in the top 30, and that list changes, so run codex debug models | grep -o '"slug":"[^"]*"' first and pick one from the output (this guide uses claude-opus-5-5).
Once configured, config.toml looks roughly like this (the red boxes are the key items for this step: the root-level model / model_provider / model_catalog_json, and the [model_providers.aihubmix] section):
Step 3: Set the environment variable
Set up the environment variable specified byenv_key above (note: no spaces around =):
~/.zshrc / ~/.bashrc to persist it. Get your Key from the AIHubMix console.
Step 4: Restart and select a model
Restart the Codex App / TUI for the catalog file to take effect, then:/model, all models declared in the catalog are listed; use the arrow keys to select and Enter to confirm:
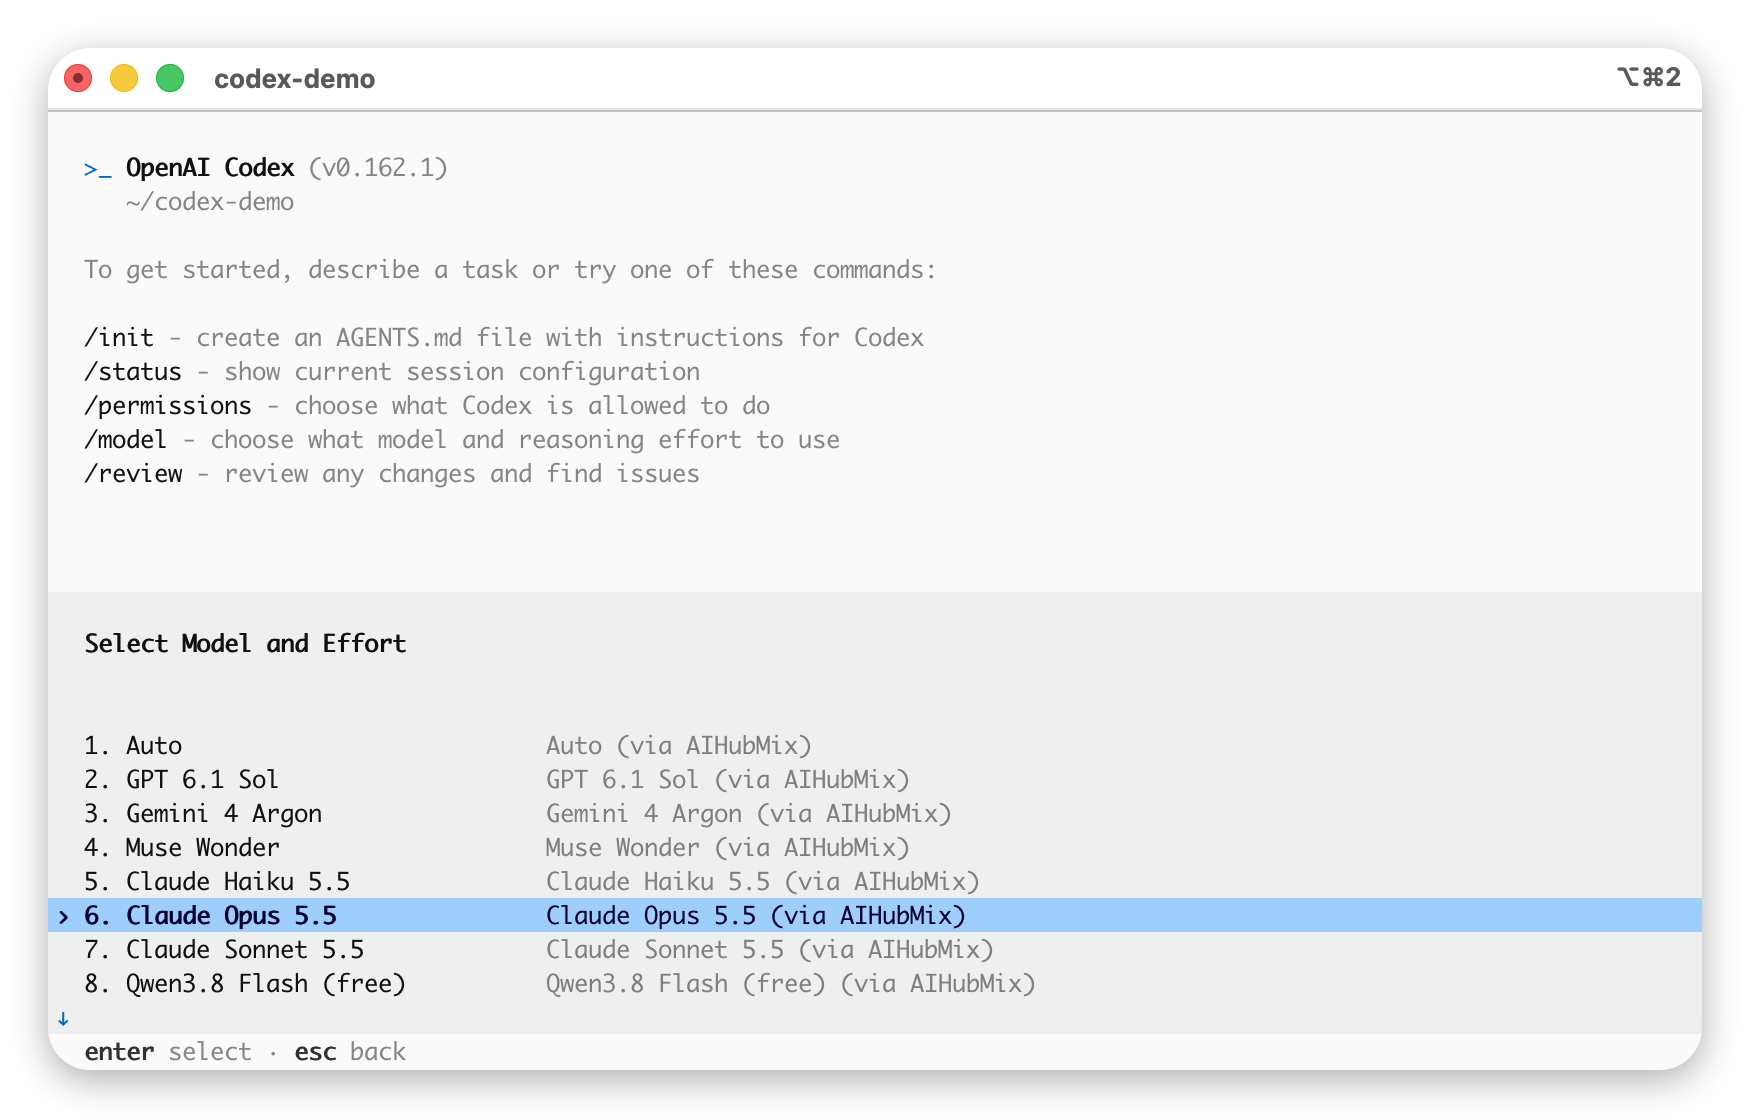
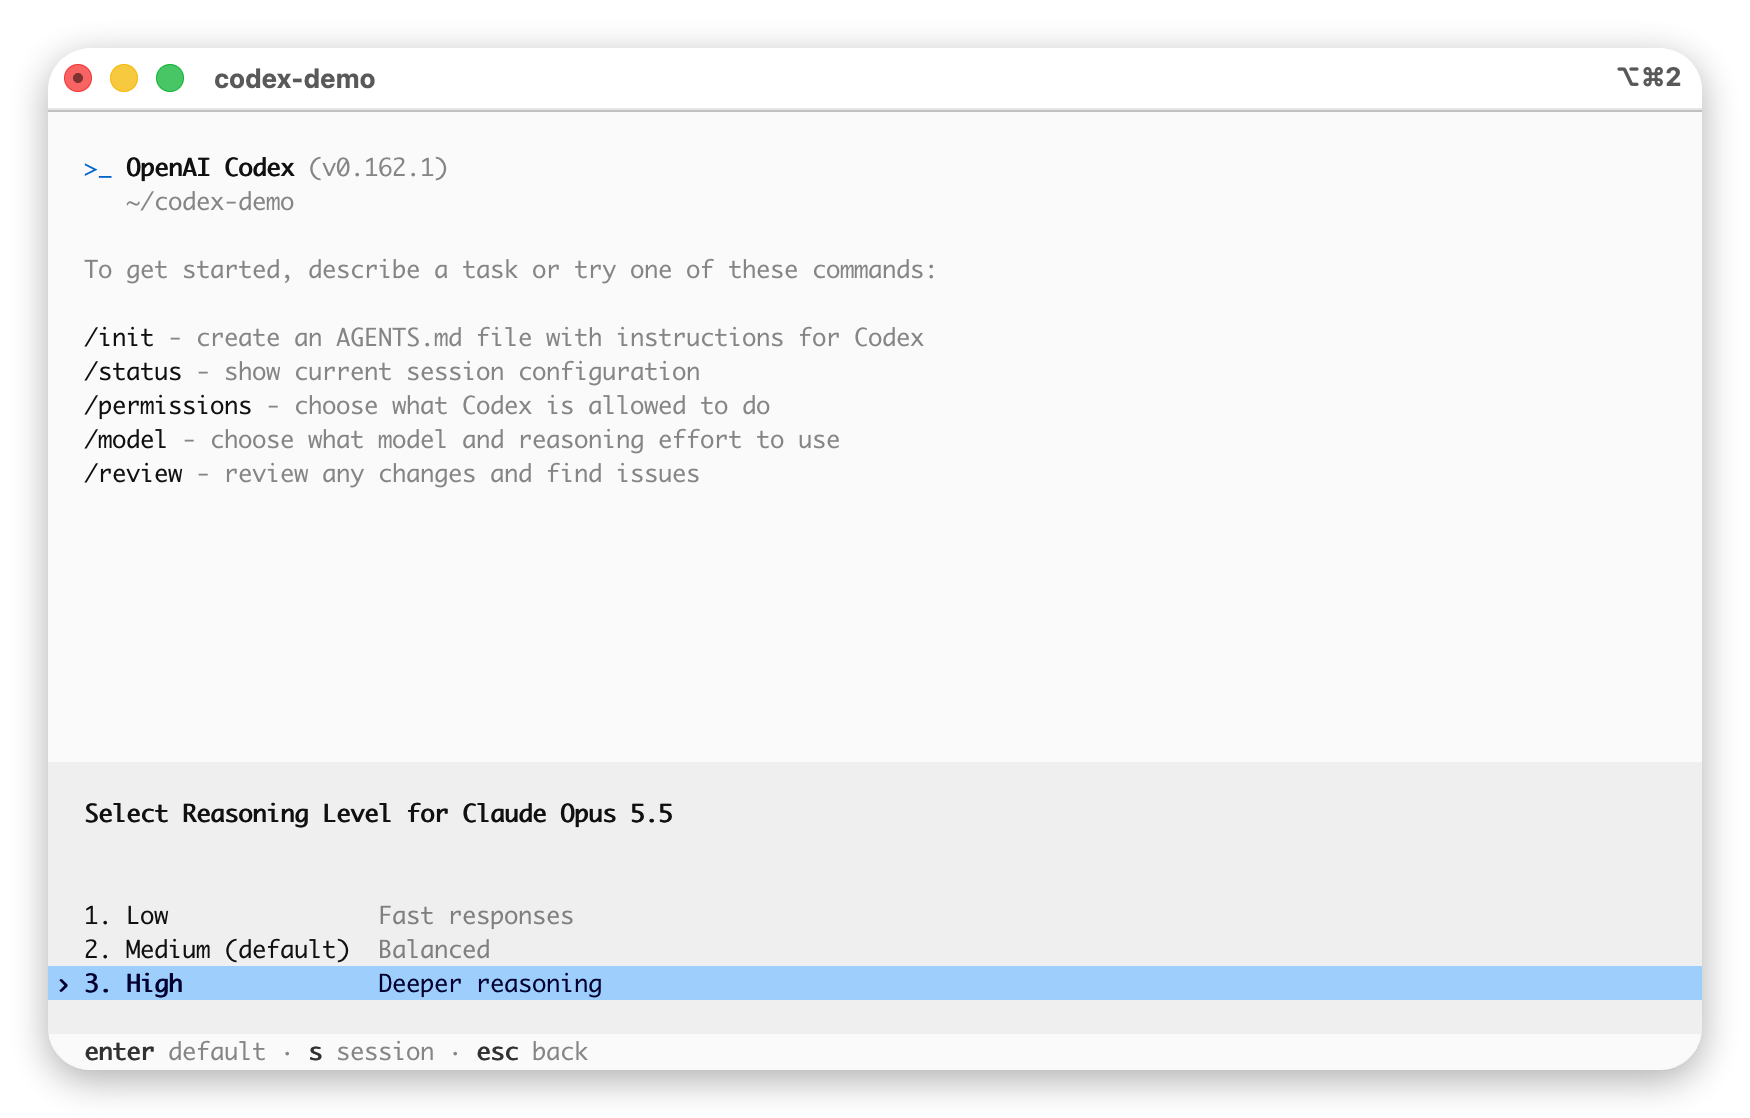
/model will also let you choose a reasoning level (effort); pick low / medium / high as needed.
Step 5: Verify it works
- Enter Codex and type
/model, confirm you can see the models declared in the catalog, and switch to one of them (e.g.claude-opus-5-5). - Ask any question to verify the link is working. Note: don’t judge by asking “which model are you”:
base_instructionssays “You are Codex… based on GPT-5”, so all models will claim to be GPT-5 accordingly, and asking won’t reveal the real model. To confirm which model was actually called, log in to the AIHubMix console and check themodel_idof that request record on the “Logs” page; that’s the truth.
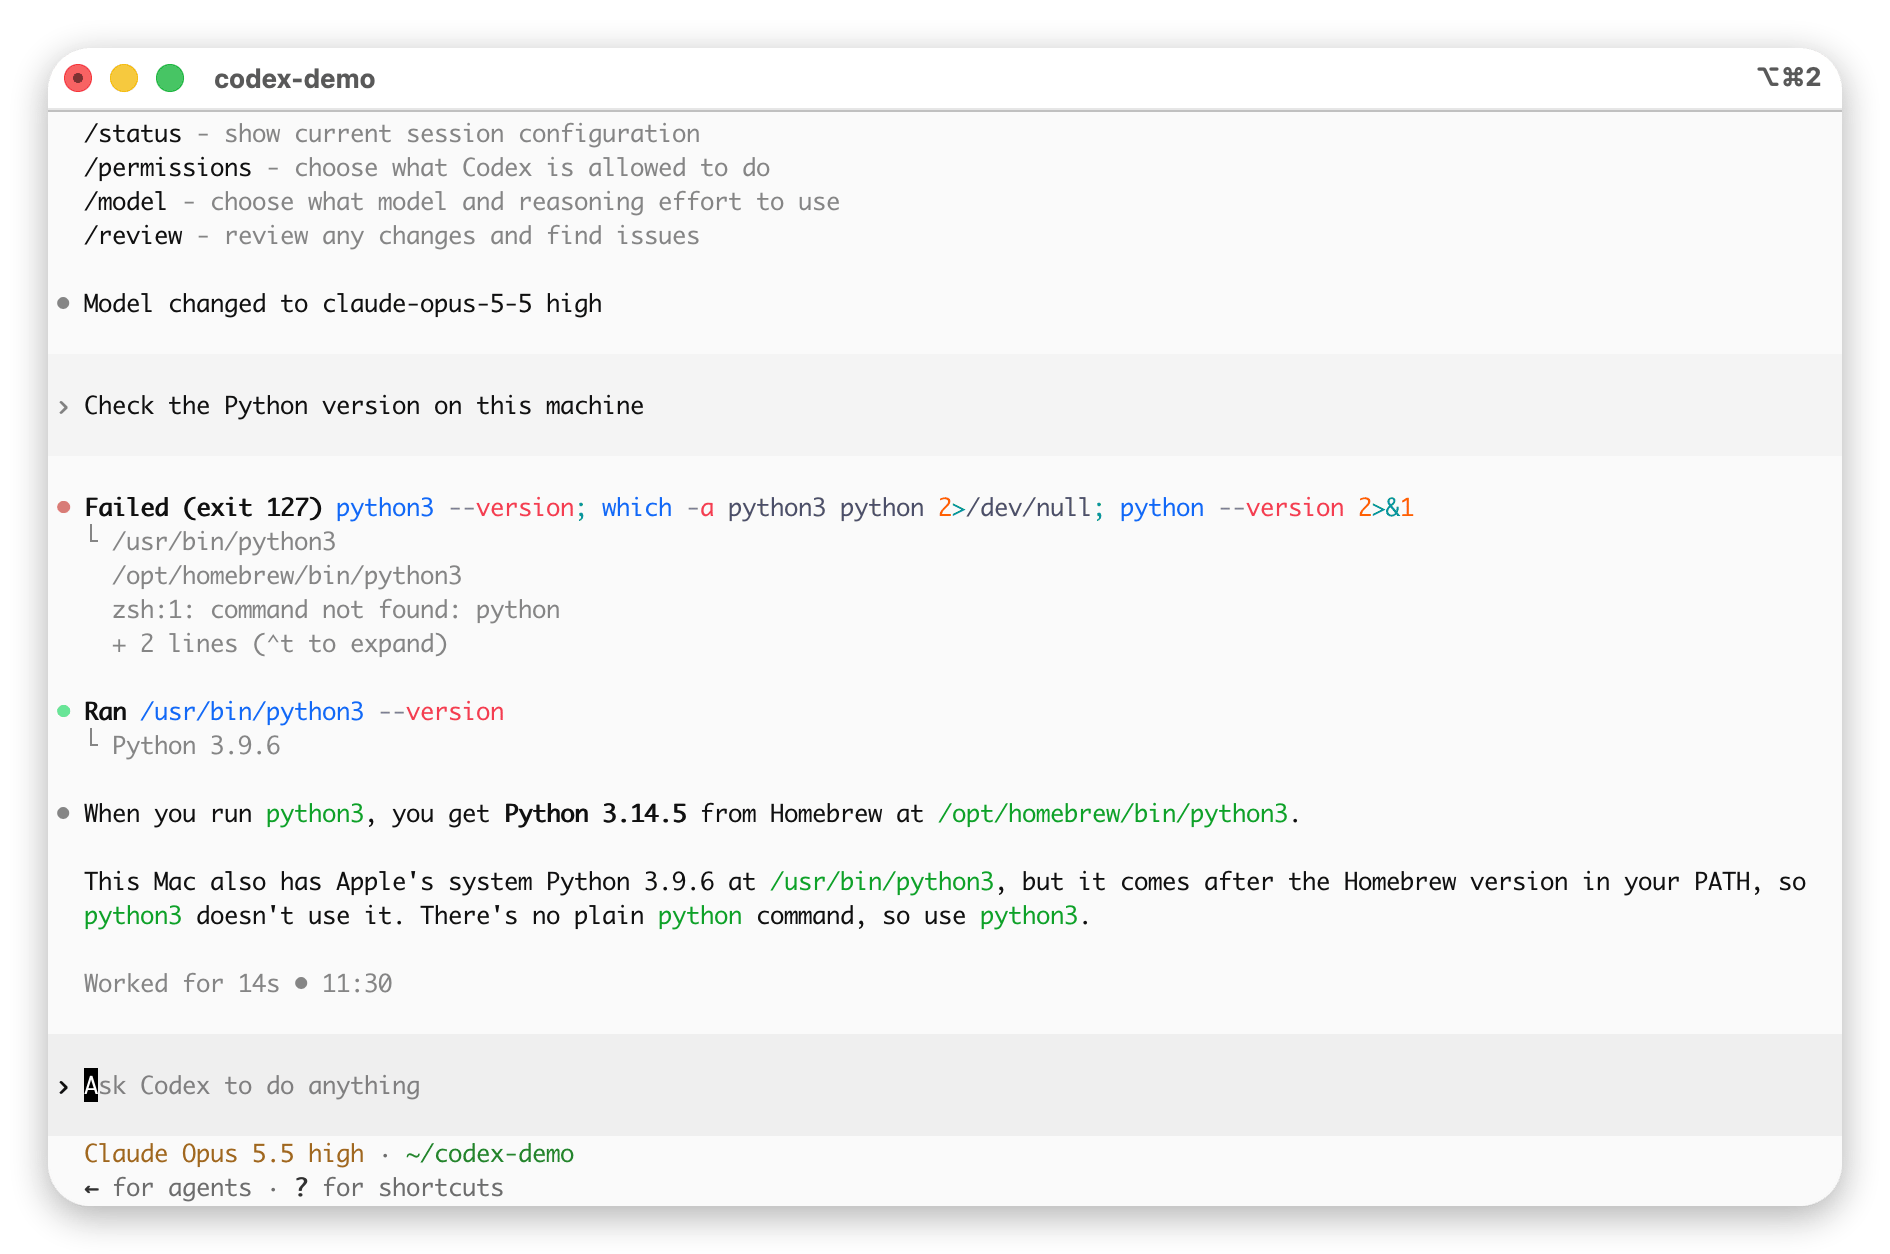
Model changed to ..., and the bottom status bar also displays the current model and context window (the image below switched to claude-opus-5-5, window 950K):
Custom Models FAQ
- Startup fails with
legacy profile = "..." config is no longer supported. Since Codex 0.134.0,profile =and[profiles.xxx]are no longer supported. Delete both parts and rewrite the config as in “Basic Configuration” above. - Catalog generated with the old script. The old script didn’t turn off code mode on the built-in template. After Codex updates, the first built-in model became a gpt-6 series model: the resulting catalog still parses, but requests carry no standard tools list. Regenerate the catalog with the new script in Step 1.
- Custom models don’t show up in
/model? Troubleshoot in order:- First run
codex debug models. If it reportsmissing field ...(most common: a required field is missing) orunknown variant ...(wrong field name/value), the entire catalog failed to parse and was discarded; just regenerate it using the “clone a built-in template” script from Step 1. - Confirm
model_catalog_jsonis written at the root level ofconfig.toml, not inside a[model_providers.*]section; - Confirm the JSON uses snake_case official fields and
visibilityislist; - If
codex debug modelscan already see all the models but the Desktop App only shows one or two with the current model displayed as “custom”, this is a known Desktop App bug: it layers an additional official-slug allowlist filter on top of the local catalog, removing non-official models from the selector (see GitHub Issues #19694, #15138). The model is in fact still called normally per themodel = "..."inconfig.toml(you can confirm in the AIHubMix logs); only the name fails to display. For correct display, use the terminalcodexCLI / TUI; on the Desktop App you can only hard-codemodel = "the model you want"inconfig.tomland wait for the official fix.
- First run
- The catalog is a “replace”, not a “merge”.
model_catalog_jsonreplaces the entire model list rather than appending (tested: with only 2 models in the catalog,codex debug modelsshows only those 2, and all built-ingpt-5.xmodels disappear). If you want both kinds, write them all into the custom catalog together. - Request reports a protocol error / can’t connect. Most likely the provider’s
base_urlorwire_apiisn’t configured correctly. AIHubMix requireswire_api = "responses"+base_url = "https://aihubmix.com/v1". If you’re connecting to a third party that only supports Chat Completions, you’ll need a local conversion proxy; AIHubMix users don’t need this step. - Keeps “Reconnecting”, then errors out. Check the last error line first.
401 Unauthorizedmeans the request went out without a key: make sure the provider section setsenv_keyand that the variable is set in the terminal you start Codex from (open a new terminal or runsource ~/.zshrc). A key that only lives inauth.jsonis not used by custom providers. - Parsing reports
missing field ...(e.g.missing field base_instructions). The entry is missing a required field. Newer versions of Codex parse strictly, andbase_instructions,availability_nux,upgrade,supports_reasoning_summaries,support_verbosity,default_verbosity,apply_patch_tool_type,truncation_policy,supports_parallel_tool_calls,experimental_supported_toolsmust all be present. The “clone a built-in template” script from Step 1 can fill them all in at once. - Parsing reports
unknown variant. The catalog JSON has a field name or value that Codex doesn’t recognize (commonly camelCase legacy formats likedisplayName/hidden). Switch to the snake_case field set in this article.
Reference Articles
- Official docs: Advanced Configuration | Configuration Reference
- Official built-in catalog format reference: codex-rs/models-manager/models.json
- Community guide: Codex config.toml: integrate any custom provider in 6 lines
Last updated: 2026-10-15